In this post we create Azure Application Insights in Workspace-based resource mode using Bicep templates. In this mode it supports full integration between Application Insights and Log Analytics. This way it is possible consolidate application, infrastructure, and platform logs in a one place.
Azure Application Insights is a part of Azure Monitor, a service to help developers to troubleshoot Azure App’s performance, diagnose issues and monitor live applications. Workspace-based resources support full integration between Application Insights and Log Analytics.
📣 General availability Workspace-based Application Insights - September 22, 2020
Workspace-based Application Insights integrates application performance management features with Azure Monitor Logs based experience. This enables perform data analytics parallel with application and platform telemetry - see more.
When creating a new Azure Application Insights service instance in Azure Portal, Resource Mode is now by default Workspace-based.
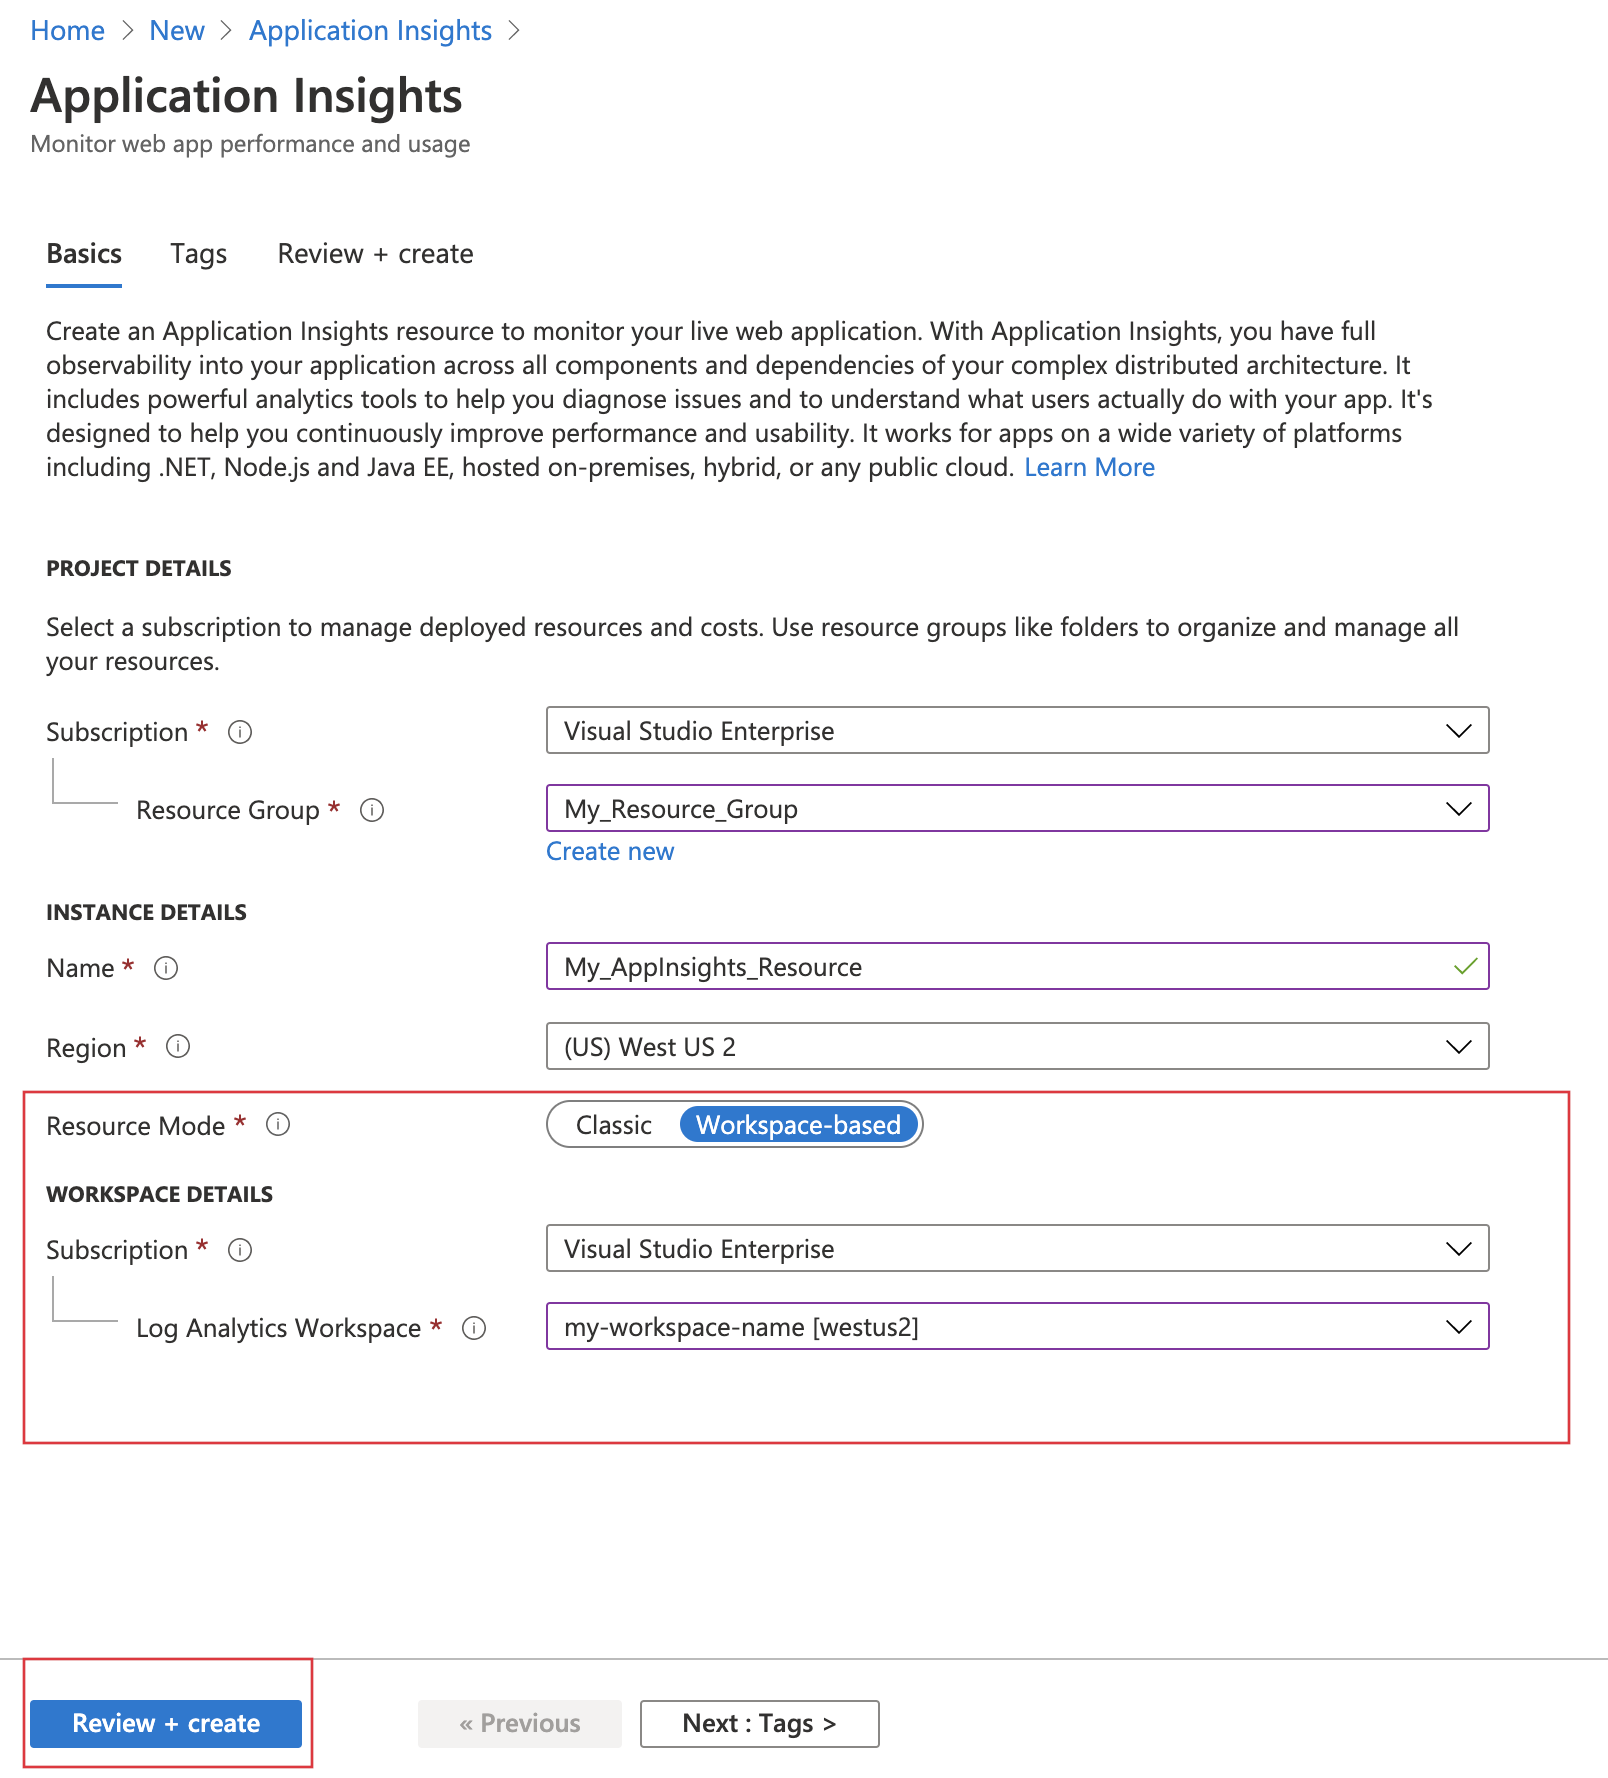
So to create a new Application Insights we need to already have existing Azure Log Analytics Workspace. Now, let’s do them both with Bicep.
🚩 NOTE
Classic Application Insights has been deprecated.
Review workspaces.bicep for Log Analytics Workspace
First template workspaces.bicep is used to create and configure Azure Log Analytics Workspace resource. By default it will use Free pricing tier. Note that we use if-else logic in the template to determine how many retention days are configured depending to the skuName parameter.
💡 The Free pricing tier is a legacy pricing tier that is available for trying Azure Log Analytics. It has a data cap of 500 MB/day and only 7 days of data retention, so it is intended only for testing and is not to be used for production deployments.
param workspaceName string = replace(resourceGroup().name, 'rg-', 'la-')
param location string = resourceGroup().location

@allowed([
  'CapacityReservation'
  'Free'
  'LACluster'
  'PerGB2018'
  'PerNode'
  'Premium'
  'Standalone'
  'Standard'
])
// Defaulting to Free tier
param skuName string = 'Free'
// Free tier can have max. 7 days retention policy
var retentionInDays = skuName == 'Free' ? 7 : 30
// Create Anlytics Logs Workspaces
resource workspace 'Microsoft.OperationalInsights/workspaces@2021-06-01' = {
  name: workspaceName
  location: location
  properties: {
    retentionInDays: retentionInDays
    sku: {
      name: skuName
    }
  }
}

output id string = workspace.id
output name string = workspace.name
🚩 Known issue - if you get and error message:
Pricing tier doesn’t match the subscription’s billing model. Read http://aka.ms/PricingTierWarning for more details.
Means that your Subscription is under a different Billing model, and may have been created recently are you are unable to use the ‘Free’ tier, instead you may have to create it using ‘standard’ instead.
Review components.bicep for Application Insights
Second template components.bicep is used to create and configure Azure Application Insights resource that is dependent on Log Analytics Workspace. This template also uses Bicep Module to deploy Log Analytics Workspace before Application Insights deployment starts.
By default it will use Free pricing tier. Note that we use if-else logic in the template to determine how many retention days are configured depending to the skuName parameter.
param appInsightsName string = replace(resourceGroup().name, 'rg-', 'appi-')
param workspacesName string = replace(resourceGroup().name, 'rg-', 'la-')
param location string = resourceGroup().location

// create workspaces resource
module workspaces './workspaces.bicep' = {
  name: 'deploy-module-workspaces'
  params: {
    workspaceName: workspacesName
    location: location
    skuName: 'Free'
  }
}

// create application insights resource
resource appinsights 'Microsoft.Insights/components@2020-02-02' = {
  name: appInsightsName
  location: location
  kind: 'web'
  properties: {
    Application_Type: 'web'
    // by referencing outputs of workspaces deployment
    // we ensure that it get created before this resource.
    WorkspaceResourceId: workspaces.outputs.id
  }
}
Note that conponent.bicep template assumes that the workspaces.bicep template has been saved to the same folder.
Deploy the template to Azure
To deploy Bicep template to Azure, you need to sign-in to your Azure account using Azure command line interface (AZ CLI).
🚩 NOTE
Remember to sign in with your Azure AD account that has Contributor access role to your Azure API management environment.
- Open a Visual Studio Code terminal window by selecting Terminal > New Terminal. The window usually opens at the bottom of the screen.}
- Switch your terminal to the directory where you saved
workspaces.bicepandcomponents.bicepBicep templates.
Sign in to Azure with Azure CLI
In the Visual Studio Code terminal, sign in to Azure by running the following command:
az login
In the browser that opens, sign in to your Azure account.
The Visual Studio Code terminal displays a list of the subscriptions associated with this account.
Set the subscription context for all of the Azure CLI commands that you run in this session.
az account set --subscription "your-subscription-name"
Create resource group with Azure CLI
Create a new Azure resource group for your Azure development environment.
az group create --location westeurope --name "rg-yourgroup-we-dev"
Deploy components.bicep template to Azure
Run the following command from the terminal in Visual Studio Code to deploy the Bicep template to Azure.
az deployment group create --template-file .\components.bicep --resource-group "rg-yourgroup-we-dev" --name "appi-and-workspace-deploy"
In the example above we are deploying template that creates Azure Application Insights and Azure Analytics Log Workspace resources to development environment.
Review deployed resources
Use the Azure portal to check the deployed resources or use Azure CLI to list the deployed APIM resources.
AZ-CLI - az monitor app-insights component show
💡 TIP
az monitor app-insights component showcommand is part of the application-insights extension for Azure CLI and requires version 2.0.79 or higher. The extension will automatically install the first time you run an az monitor app-insights component command.
Execute AZ-CLI command:
az monitor app-insights component show --app "appi-yourgroup-we-dev" --resource-group "rg-yourgroup-we-dev"
Notice the properties connectionString and instrumentationKey since one of those is used to connect services such as Azure App Service telemetry withy Application Insights. For example to enable .NET core app to send telemetry, following would be added to appsettings.json
{
  "ApplicationInsights": {
    "InstrumentationKey": "<put-instrumentationkey-here>"
  }
}
alternative a bit more DevOps-ish approach is adding the instrumentation key with Bicep template and update app service’s environment variables.
Azure Portal
- In the Azure portal, search for and select Application Insights services, and select the service instance you created.
- Review the properties of your service on the Overview page. Notice the Instrumentation Key and Workspace.
See also
- MS learning path: Monitor the usage, performance, and availability of resources with Azure Monitor
- MS docs: Azure Application Insights overview
- MS docs: Create an Application Insights resource
- MS Bicep Reference: Microsoft.Insights components
- MS Bicep Reference: Microsoft.OperationalInsights workspaces
- MS docs: Cloud Adoption Framework recommended resource prefixes